Showing posts with label Framelits. Show all posts

Sunday, February 28, 2016

ONE MORE PYRAMID PALS THINLITS BOX!


This is a box my friend Keri made with the Pyramid Pals Thilits.  We got together over the holidays to make some things with her new Occasions Catalog purchases, and we had the best time.  I think this is the cutest box ever!

Thursday, May 21, 2015

FLOWER PATCH FUN!


This is the card Linda shared last month at Demo Divas with us, and I love it!  she used the Flower Patch stamp Set with the matching Flower Fair Framelits, which made this a very quick and easy card to make.  I love the added texture with embossing the big dots on the background.  Thanks for sharing with us, Linda!!

Monday, February 16, 2015

MORE SOMETHING LACY FROM STAMPIN' UP!


I recently hosted an Occasions Catalog and Sale-A-Bration swap for some demonstrators, and this card was my submission.  I used the Something Lacy Background Stamp from the Occasions Catalog, along with the Lotus Blossom FREE Sale-a-Bration Stamp.  The base of my card is made with the Circle Card Thinlits Dies, and when you take off the belly and, the card flips open and you can see the back of the circle.  It is sort of a 3-D Card. 
Circle Card Thinlits DieSomething Lacy Wood Stamp by Stampin' Up!

Wednesday, January 28, 2015

LOVE IS KINDNESS STAMPIN' UP! STAMP SET IS SO CUTE!

Stampin' Up! has some of the most adorable single stamp sets, and this is one of my favorites!  It is available in the Occasions Catalog and I think it's perfect to use your Blendabilities with.  This would make a great Easter card too.

Love Is Kindness Wood Stamp by Stampin' Up!
ORDER YOUR STAMP HERE!

Thursday, January 22, 2015

STAMPIN' UP! YOU PLUS ME STAMP SET!


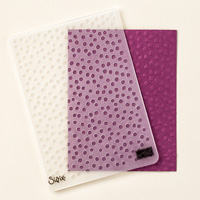
I made this card with the You Plus Me Stamp Set in the Stampin' Up! Occasions Catalog.  It is made with the traditional Real Red and Whisper White Valentines Day color combination.  I used the Hearts Collection  Framelits for the Big Shot and the Decorative Dots Textured Impressions Embossing Folder for the Big Shot, the circle punch and then just added a Rhinestone Jewel for some "bling".  All of the great Stampin' Up! tools/accessories make this card super quick and easy to create.


Wednesday, January 14, 2015

MINI TREAT BAG THINLITS DIES VARIATION!

I was playing around with different variations for bag sizes made with the Mini Treat Bag Thinlits Dies, and came up with this really cute and easy idea.  I shared it with my Demo Diva group tonight, and it was a big hit!

I used this piece from the Thinlits to make this little bag that fits my Hershey Bar with Almonds perfectly!

I cut two pieces of DSP 3" x 5 1/2" and cut them both with this Thinlit piece and then just added some Multipurpose Liquid Glue (Tombow Green Glue) to the edge that is scored and across the bottom; then glue the two sides together.  This is so easy and quick!! I did fold the bottom up about 1/2". This would be very cute to use for party favors for a baby shower or wedding or birthday with hearts or balloons or umbrellas; how about a masculine birthday with the mustache framelit on the front?  I think it would work at the holidays with candy canes inside and a big Santa face on the front The possibilities with this little bag are endless!

ORDER YOUR MINI TREAT BAG THINLITS DIES HERE!

Monday, October 6, 2014

STAMPIN' UP! GLIMMER PAPER GETS ITS "CURVE" ON!


This is another one of the boxes "That Michelle" and I made.  I love the Glimmer Paper with the feathers~~might be my favorite of all the boxes we have made so far.  For this one we used the Silver Glimmer Paper, the Four Feathers Stamp Set and the coordinating Feathers Framelits Dies.  The feathers are stamped in Tempting Turquoise, Old Olive and Melon Mambo.  And, of course, we used the Curvy Keepsake Box Thinlits Dies.

Thursday, August 7, 2014

STAMPIN' UP! SOMETHING FOR BABY!

Nancy is the talented Demo Diva up next on our New Catalog Swap Tour!
Nancy used the Something For Baby Stamp Set, along with the coordinating Baby's First Framelits Die.  She also used the Itty Bitty Accents Punch Pack to punch her "little heart" out~~get it, punch her little heart out....  The Designer Series Paper is the Lullaby DSP and it all coordinates so nicely together.  This is a perfect example of how easy card making can be when everything (ink colors, card stock colors, marker colors....) coordinates.  Thanks for sharing your creativity with us, Nancy!

Sunday, April 27, 2014

HAPPY BIRTHDAY CIRCLE CARD FRAMELITS DIE!

This is a little "twist" with the Circle Card Framelits Die.   You can make your card be a horizontal flip card.

CIRCLE CARD FRAMELITS DIE GIFT CARD HOLDER!

Last week I had my Circle Card Framelits Product Party and this was the favorite card.
This is the card all closed up with the belly band around it.

This is the card opened up.  The last strip on the right is not taped down, and you can stick a gift card right inside.

This card was totally inspired by Bertina, one of my table mates at our Creative Escape weekend.  If you remember, she made a card with this pattern using the Perfect Blend Stamp Set.  I swapped stamp sets out, so I could use this retiring stamp set atleast one more time before we had to part ways.  If you have forgotten what Bertina's card looked like (it was awesome), you can see it HERE!

Saturday, February 15, 2014

SEE YA LATER AND GORGEOUS GRUNGE COLLIDE!

Gorgeous Grunge was one of those stamp sets that I was certain I did not need.  My mind was quickly changed, and I knew I NEEDED to add it to my ever-growing collection of "Must-Have" stamp sets.  I paired it with See Ya Later (one of the FREE Sale-A-Bration stamp sets) for this card.
See Ya Later was the very first Sale-A-Bration "Must-Have" stamp sets for me, and I am not regretting that decision at all.  Monday night the Rubber Room will be hosting a Sale-A-Bration Open House and Bingo Bash, and this is one of the make-and-takes we will be making.  I am very fond of this color  combination (Rich Razzleberry, Pumpkin Pie, Old Olive and So Saffron).  I used framelits to cut the oval for the sentiment and the Old Olive piece it is layered onto.  Then I sponged a little So Saffron around the edges of the oval.  I think I can safely add this to my stash of masculine birthday cards.
Gorgeous Grunge
Gorgeous Grunge Clear-Mount Stamp Set
Clear-Mount #130517  Price:  $17.95
Wood-Mount #130514  Price:  $24.95
Ovals Collection Framelits Dies
#129381   Price$26.95

Labels Collection Framelits Dies
#12598   Price$26.95

YOU CAN ORDER ALL YOUR STAMPIN' UP! SUPPLIES 24/7 HERE!


Wednesday, January 29, 2014

GOTTA LOVE "THAT MICHELLE"

I have been seriously missing my play time with "That Michelle", and finally, today, we were able to get together again.  AND she is still just as talented and "over the top" as always.  Truly love what she does!!
This is such a beautiful little heart candy holder.  The roses were "just scallop circles".  I don't about anyone else, but when I punch a scallop circle, it does not come close to resembling these beautiful flowers.  Thank you so very much, Michelle, I love it!!

Tuesday, January 7, 2014

IT IS WEEKLY DEAL TIME AGAIN!


There is no better way to start the new year than by saving some dollars and treating yourself!
This is what is on sale this week at Stampin' Up!.  My favorite is the Houndstooth Embossing Folder for the Big Shot.  And, of course, the Envelope Liners Framelits Dies can be used for lots of things besides just making envelope liners.  You can never go wrong with ribbon, as it is, in my humble opinion, the best accessory!

ORDER YOUR WEEKLY DEALS HERE!

Monday, October 14, 2013

NEW FRAMELIT STORAGE AREA!

I have been super busy lately, but have not meant to be neglecting my blog and sharing creative ideas with all of you faithful blog readers.  My sister was visiting last week, and I took some time away from my computer to just be with her.  We had a wonderful visit and it was very productive too.  I had a couple classes/groups last week that kept me busy AND there was a ton going on at Stampin' Up!.  My first priority was to get you caught up with the Stampin' Up! sales and updates.  Then I started feeling a little "punk".  Not getting the flu, but definitely not feeling 100% (sniffles, throat tickle, achey, tired...).  Doubled up on supplements and laying low trying to not get a full-blown cold!!  So, sleeping lots and resting lots.

Most of you who have visited the Rubber Room and/or know me through this Blog or Stampin' Up! know that I am extremely organized.  I credit my organization to my ability to get as much done as I do.  Organizaton helps me keep it all straight and moving in the right direction!  Last week I started a little "organization" makeover, if you will.  Since Stampin' Up! introduced their new-style punches, I have slowly been replacing my old-style punches.  I had a great space for my old-style punches, but it was starting to look a little "empty".  I had lots of the skinny-style stamp cases (the ones that hold the clear-mount stamps) that were decorated with beautiful DSP, and there was a magnet on the inside to put my framelits in.  I wanted to be able to see my framelits.  I firmly believe, if you don't see it, you don't use it.  I don't want to waste my creative time looking in drawers for stuff.  Some of you may remember the corkboard that I put little round magnets on for my framelits.

I have since outgrown my little board.  To cut to the chase here, this is my new framelit storage spot. 

As you can see, there will be lots of "expansion room" as more and more punches are retired and/or replaced.  I purchased a role of magnet (the black strips behind the framelits), and just stuck it to the wood.My framelits love their new home, and I love them being out where I can see all of them!

Tuesday, September 24, 2013

FESTIVE FLURRY CARD!

I love the fresh-clean look of this card!
Print Friendly and PDF
This is a card Jen shared with us at the Creative Convention, and Beth and Keri and I had to remake it because we liked it so much.  This card made me fall in love with the new Smoky Slate color.  We used lots of goodies to create this beauty.  The Festive Flurries stamp set and coordinating Framelits can be found in the Holiday Mini Catalog, and they can be ordered as "bundle" to save money.  The background was made using the striped stencil from the Build a Banner Simply Created Kit, also available in the Holiday Mini Catalog.  We used Silver Shimmer Paper, and Tea Lace Paper Doillies to layer behind the snowflakes and then gave it a little bling with some Rhinestone Jewels.  For the edge of the snowflake, we made a little bow with the White Linnen Thread
Festive Flurry Clear-Mount Bundle
Festive Flurry Clear-Mount Bundle 133285 Price: $46.95
Festive Flurry Wood-Mount Bundle 133284 Price: $54.95

 Build a Banner Simply Created Kit
Build A Banner Simply Created Kit 133507 Price: $19.95

Basic Rhinestones Jewel Accents
Basic Rhinestones Jewel Accents 119246 Price: $4.95

Silver Glimmer Paper
Silver Glimmer Paper 124005 Price: $4.95

Tea Lace Paper Doilies
Tea Lace Paper Doilies 129399 Price: $2.95
White Baker's Twine
White Baker's Twine 124262 Price: $2.95
ORDER ALL YOUR STAMPIN' UP! PRODUCTS HERE!

Hugs from the Rubber Room